Translate

Saturday, August 7, 2010

Bake Me a Bread!!

Saturday, August 7th, 2010

One of the most wholesome goodness feeling is to do something from scratch and it turned out to be better than what you would have imagined. This time, I'm talking about baking your own bread. And not only just any bread. It's a bread with full of wonderful fresh herbs that you get from your very own garden. Well, this is the bread that I baked last week - Fresh Herb Bread. A recipe taken from Betty Crocker Bread Machine book.

Half-way through the kneading process, the power tripped and the bread machine came to a halt. I was kind of upset since I've never bake a bread the 'old-fashion' way before. I thought that 'oh no, there goes my bread!. What do I do now?' However, since I read a lot on culinary stuff and watching Astro Food Channel, I put my little 'knowledge' (if you can call it that) to use and took the dough out from the machine and tried my hand at making the bread the 'old-fashion' method. Well, thanks to the power failure, I finally discovered that I do have some 'talent' at making bread without the bread machine! Haahaa...


Fresh Herb Bread

Makes 1 1/2 pound recipe

1 cup plus 2 tbsp water
2 tbsp butter, softened
3 cups bread flour
2 tsp chopped fresh sage leaves
1 tbsp chopped fresh basil leaves
1 tbsp chopped fresh oregano leaves
2 tsp chopped fresh thyme leaves
1/4 cup chopped fresh parsley
3 tbsp dry milk
2 tbsp sugar
1 tsp sal
1 1/2 tsp yeast

Place all ingredients in the bread machine pan in the order recommended by the manufacturer.

Select Basic/White cycle. Use medium or light crust color. Remove baked bread from pan and cool on wire rack.

Fresh herbs are so aromatic, refreshing and easy to get. If you don't have all of the herbs mentioned above, you can use any herbs that you can find. Since I have quite a collection of herbs in my garden, I decided to go with Rosemary, Sage, Dill, Oregano and Thyme. If you are not sure what these herbs are and how they look like, here are some photos taken from my Herb Garden.
Rosemary

Oregano

Thyme

Sage

Dill

Friday, July 30, 2010

Flavors of Northern Indian

Friday, July 30th, 2010


I love Northern Indian cuisine. The aroma of spices and melt-in-the-mouth pilaf rice or briyani rice is just out-of-this-world. You simply must have the curry as well and not just any curry..it has to be the one that is rich with spices and yogurt and tomatoes. Especially if you add mutton to it, the flavor from the meat will enhance the quality of the curry.

Why do I love Indian cuisine? Well, I just have to put the blame on my childhood best friend who is a local Indian. Whenever her mom cooks mutton curry, I will definitely get invited to a meal of Idli and her absolutely yummy mutton curry. Idli is my favorite 'bread' of all breads in Indian cuisine. Idli is made from rice flour that is milled and added with sour milk, if I remember correctly. I used to follow my friend to get it milled. That was her chore and since we were best of friends, we practically go everywhere together. I wish I had gotten the mutton curry recipe and how to make the Idli from her mom but well, I was only 10 years old at that time.

So, last week I attempted at cooking Mutton Briyani and it turned out to be a success! With the help from my collection of culinary books, here is one recipe that is just fantastic. This recipe is taken from '200 Curries' by Sunil Vijayakar. To accompany this dish, I also cooked the Egg & Potato Curry - recipe is also taken from this book. In this book, the briyani is actually cooked with lamb but instead of lamb, I decided to go with mutton. Good thing is, you don't have to alter the rest of the recipe. It's 100% reliable.

By looking at the recipes, you might feel overwhelmed with all the preparations that you have to do but belief me, there's really nothing to it. It's very easy and simple to cook. Try it!

So, here are the recipes...

Royal Lamb (Mutton) Briyani

4 garlic cloves, crushed
1 tsp finely grated fresh ginger root
150ml natural yogurt
6 tbsp finely chopped fresh coriander
500 g boneless lamb (mutton cutlets with bones), cut into bite pieces
8 tbsp sunflower oil
2 onion, finely chopped
2 tbsp medium curry powder
200g canned chopped tomatoes
2 tsp cumin seeds
6 cloves
10 black peppercorns (optional)
4 green cardamon pods
1 cinnamon stick
200 g basmati rice
400 ml water (I used 200ml water, 200 ml evaporated milk)
1 tsp saffron (use tumeric powder as a cheaper substitute)
3 tbsp warm milk
butter for greasing
salt to taste

1. Mix together the garlic, ginger, yogurt and fresh coriander and rub into the lamb (mutton) and marinate, refrigerated for 4-6 hours. Heat half the oil in a heavy based pan, add half the onion and cook for 12-15 mins till golden. Add the meat and cook over high heat for 15 mins, stirring often.
2. Stir in the curry powder and tomatoes, season and bring to boil. Reduce heat and simmer for 30 mins or until lamb (mutton) is tender. Set aside.
3. Meanwhile, heat the remaining oil in a separate pan. Add the cumin seeds, remaining onion, cloves, peppercorns, cardamons and cinnamon and stir fry for 5 mins. Add the rice and stir fry for 2 mins. Pour in the measured water (and milk), bring to the boil, cover and simmer for 6-7 mins. Remove from the heat. Mix the saffron with the milk and set aside.
4. Lightly butter a casserole dish and spread a thin layer of the lamb (mutton) over the base and cover evenly with half the rice. Drizzle over half the saffron mixture. Top with the remaining lamb (mutton) then the remaining rice. Drizzle over the remaining saffron, cover with the foil and then the lid. Cook in the preheated oven at 180C for 30 mins or till rice is done.


Egg & Potato Curry

2 tbsp sunflower oil
1 tbsp black mustard seeds
2 garlic cloves, crushed
2 dried red chillies
curry leaves
1 onion, thinly sliced
1 tsp chilli powder
1 tbsp ground coriander
1 tbsp cumin seeds
1/2 tsp ground tumeric
200 g canned chopped tomatoes
1 tsp sugar
400 ml coconut milk
6 eggs, hardboiled, shelled
2 potatoes, boiled, peeled and cut into bite sized pieces
salt to taste

1. Heat oil in large nonstick wok or frying pan, then add the mustard seeds. When they start to pop, add the garlic, chillies and curry leaves and fry for 1 min. Add the onion and cook, stirring constantly for 5-6 mins.

2. Stir in the chilli powder, ground coriander, cumin seeds and tumeric and then stir in the tomatoes and sugar. Bring to the boil, reduce the heat and simmer for 8-10 mins, stirring often.

3. Stir in coconut milk, add the eggs and potatoes. Cook gently for 8-10 mins till the sauce has thickened. Season with salt and serve.

(I added eggplant and cabbage after coconut milk was added in)


Feeling hungry! Yeah, me too!

Saturday, July 17, 2010

King of Fruits


Sunday, July 18th, 2010


Mmmm...Durians..by just looking at the picture one can almost smell and taste the sweet velvety flesh of the most wonderful fruit on earth!

It's been awhile since my last update. Sorry guys, for making you wait. After weeks of busy schedule and couple with laziness, finally I'm back. This time, this is dedicated to all the Durian lovers out there!

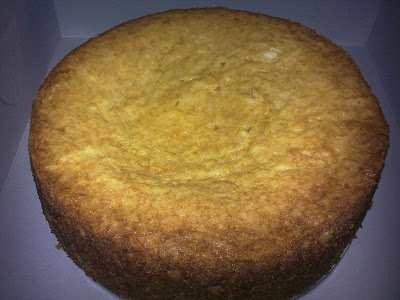
At each durian season, there's always an intention to try in baking durian cake but it never happen..finally I did it! The texture is very soft and moist. Similar to suji cake but with the extra oommph of durian flesh. My family love it and I don't mind baking it again.

My personal preference has always been the 'kampung durian' as it has its own distinctive flavour and aroma and not too 'rich' in taste. I love to have a variety of durians including the so called 'branded' ones as well like the D24, D2, XO, 'mao sang' etc but none of it beats the kampung version.

For the benefit of those who are not so 'into' durians or wonder what is durian, you may find the information below which I googled up and hopefully after reading this, you will get 'hooked' to the King of Fruits just like I do.

The durian (pronounced /du-ri-en) is the fruit of several tree species belonging to the genus Durio and the Malvaceae family (although some taxonomists place Durio in a distinct family, Durionaceae). Widely known and revered in southeast Asia as the "king of fruits", the durian is distinctive for its large size, unique odour, and formidable thorn-covered husk. The fruit can grow as large as 30 centimetres (12 in) long and 15 centimetres (6 in) in diameter, and it typically weighs one to three kilograms (2 to 7 lb). Its shape ranges from oblong to round, the colour of its husk green to brown, and its flesh pale yellow to red, depending on the species.

The edible flesh emits a distinctive odour, strong and penetrating even when the husk is intact. Some people regard the durian as fragrant; others find the aroma overpowering and offensive. The smell evokes reactions from deep appreciation to intense disgust. The odour has led to the fruit's banishment from certain hotels and public transportation in southeast Asia.

The durian, native to Brunei, Indonesia and Malaysia, has been known to the Western world for about 600 years. The 19th-century British naturalist Alfred Russel Wallace famously described its flesh as "a rich custard highly flavoured with almonds". The flesh can be consumed at various stages of ripeness, and it is used to flavour a wide variety of savoury and sweet edibles in Southeast Asian cuisines. The seeds can also be eaten when cooked.

There are 30 recognised Durio species, at least nine of which produce edible fruit. Durio zibethinus is the only species available in the international market: other species are sold in their local regions. There are hundreds of durian cultivars; many consumers express preferences for specific cultivars, which fetch higher prices in the market.


Ever wonder how the flower looks like, well, here it is..

http://upload.wikimedia.org/wikipedia/commons/5/58/Durian_flower.jpg

And now, here's the Durian Cake that I baked yesterday and the recipe as well..I hope you will try this recipe since it's after all, the Durian season and to make my effort in posting this worth its while! Kaakaakakaa...are you drooling already?? huh! huh?


Durian Butter Cake

Ingredients:
200g margarine }
50g butter } (I used 250g butter instead of mix it with margarine)
220g castor sugar (I reduced the sugar as the durian flesh is already quite sweet)
4 eggs
250g durian flesh (can add more)
1/4tsp durian essence (never like artificial essence, so I omit this)
230g self-raising flour
20g coconut powder (not sure what this is so I omit this as well)
1/8tsp baking powder
1/4tsp bicarbonate of soda

1. Grease mould and preheat oven to 170C
2. Beat margarine, butter and sugar till light and fluffy. Add eggs one at a time, beating thoroughly after each addition.
3. Stir in durian flesh and essence. Fold in sifted flour, coconut powder, baking powder and soda. Mix until well blended.
4. Spoon batter into prepared mould and bake for 45 mins or until cake is done.


Thanks for visiting my blog..till the next time!


Saturday, May 8, 2010

Happy Mothers' Day

Sunday, May 9th, 2010

It's Mothers' Day!
Most restaurants will be packed today and not to mention the price for a meal is going to cost you a small hole in your pocket as well.

Well, I had a fantastically delicious dinner at home today. My hubby took over the kitchen and did a great job at it too! With a little help from my children, here's the menu:

Onion Soup
Roast Chicken with Potatoes
Garlic Bread
Broccoli with Butter
Apple Crumble with Vanilla Ice-Cream

Just looking at the menu will make you salivate!

The best part is, the dinner is extremely delicious..more so when it's prepared by your love ones. This whole day today, I could smell the aroma of the chicken being roasted, the sweet smell of the onion soup being boiled to perfection, the buttery garlic bread and the sweet aroma of the apple crumble once the crumble starts to caramelized, wow, it's just wonderful!

So, Cheers to all the Mothers out there and may you be blessed with a loving family. I know that I am!

A Toast to my wonderful hubby and my children for a wonderful dinner and for being you just as you are! Love you to bits!

Lastly but not least, HAPPY MOTHERS' DAYS to my sisters and most of all to the most wonderful mother ever! The late Bibik Chwee. Love you lots, Mom and all of us miss you!


Onion Soup & Roast Chicken


Apple Crumble with Vanilla Ice Cream

Perfect dinner!


Thursday, April 22, 2010

Korma Chicken

Thursday, April 22, 2010

If you want to know how to cook Korma Chicken, here's how..enjoy watching!


Monday, April 19, 2010

Fish Sambal in White Rice Vinegar

Monday, April 19th, 2010

Fish Sambal in White Rice Vinegar is one of my favorite dish which my dear late mom used to cook for us whenever my dad had a good catch from the sea. My dad loves to fish in the open sea and I remember when we were little, he had a small 'sampan' and together with his friends and sometimes alone, will go out to sea to fish. He used to bring back all types of fish ie. mackerel, stingray, red snapper, grouper, baby shark, threadfin, promfret, prawns, squids and the list just goes on and on and on. That's how my sisters and I are able to name and recognize most sea fishes. Imagine the freshness of all those seafood and the good thing was, they were free. Now, we have to buy them from the market and the freshness is questionable at times. He still goes fishing every once in a while with his fishing 'kakis' although not as often as he would have liked to.

Ok. So, here's the recipe for the Fish Sambal. The best fish to cook in this recipe is cencaru or horse-mackerel in English and instead of tamarind juice which is usually used in sambal, my mom used white rice vinegar. This is simply out of this world!


5 shallots
7 dried chillies
3 candlenut
1/4 inch belacan (dried shrimp paste)
- blend together the above ingredient

2 cencaru - cleaned and drained
2 medium tomatoes - quartered or 5 -6 cherry tomatoes
1 big onion - julienne into rings
3 kaffir leaf
1/4 cup oil
1/4 cup water
3 tbsp white rice vinegar (add more if you prefer)
Salt and sugar to taste


1. Heat oil till very hot and fry the cencaru till crispy. Dish and drain.
2. Fry the blended paste (together with the kaffir leaf) in the oil till fragrant and the oil separates.
3. Add water, vinegar, sugar and salt to taste.
4. Add in the tomatoes and let it boil for 2 -3 mins but constantly keep stirring to prevent burning.
5. Lastly, just when the taste is right, add in the big onion. Do not overcook the onion. It should be crunchy and juicy.

I highly recommend that you try this recipe..once you've cooked it and eat it, I bet you will cook it again and again and again...

Friday, April 16, 2010

What's Sewing??

Friday, April 16th, 2010

It's been awhile since my last update as there was 'domestic crisis' that I had to attend to and the mood just wasn't there.

Now that everything is almost back to 'normal' I had some time to complete my next sewing project. This project is kinda spontaneous as I had my family member stayed over and was short of some blankets.

If you've been following my blog, you will remember the comforter that I did. From there, I have lots of remnants left of the fabric. So, the birth of my new project which I completed 2 days ago - patchwork blanket. This time, all are machine sewn as I don't have much time as before to hand-sew it. Here it is..


Completed in 2 1/2 weeks. Comfy comfy...zzz.z.zzz


Saturday, March 13, 2010

Say 'Cheese'!


Saturday, March 13, 2010

For those of you who love cheese as much as I do, will find this Lemon Cheesecake With Chocolate Glaze an out-of-this-world piece of cake. If you are not into cheese, well, you don't know what you miss!

This melt-in-the-mouth cake I tell you, is as close to what Secret Recipe can offer. Check this out - did this today and it's a flourless cake. This is the second time I make this cake and at both times, it's a hit with my family. If you ask me to rate this cake out of 10, well, I will rate this an 11!!

This cheesecake can be made up to 3 days ahead; keep, covered, in refrigerator. Unglazed cheesecake can be frozen for up to a month but unsuitable to microwave.

Ok, here's it is...freshly baked cheesecake.


With Chocolate Glaze

Lemon Cheesecake with Chocolate Glaze

1 cup plain uniced chocolate biscuit crumbs
90g butter, melted

Lemon Cream Cheese Filling:
1/2 cup cream
150g White Melts, melted
500g packaged cream cheese, softened
1 cup castor sugar
3 eggs
2 tsp grated lemon rind
1/4 cup lemon juice

Chocolate Glaze:
200g dark chocolate, melted
2 tbsp light corn syrup
60g unsalted butter, melted

1. Lightly grease 20cm round spring form tin, cover base with foil, grease foil.
2. Combine biscuit crumbs and butter in bowl. Press evenly over base of prepared tin, refrigerate while preparing filling.
3. Pour filling into tin, bake in moderate oven for 50 mins or until just firm in center; cool in oven with door ajar. Remove cheesecake from tin; refrigerate 1 hour.
4. Place cheesecake on wire rack over tray. Spread warm topping all over cheesecake, refrigerate until set. Decorate with crystallized lemon peel strands, if desired.

Lemon Cream Cheese Filling:
1. Combine cream and White Melts in small bowl, stir until smooth.
2. Beat cheese and sugar in medium bowl with electric mixer until light and fluffy.
3. Beat in chocolate mixture gradually while motor is operating. Beat in eggs 1 at a time, then lemon rind and juice; beat until combined.

Chocolate Glaze:
Combine chocolate, corn syrup and butter in a bowl, stir until smooth, glossy and pourable.

Looks complicating and like there's a lot of work to it? Well, actually, not really. This is very very easy to make and you will be wonderfully rewarded! Trust Me!!!

Say Cheeseeeeee!

Friday, March 12, 2010

Street Food


Friday, March 12, 2010

Couple of weeks ago, together with a few of my friends from the office, we visited our colleague who had just given birth to her 4th child - a baby girl! This time round she decided to stay in a 'Maternity Home' where she can be taken care of for about 28 days. This Home is situated in Taman Tun Dr Ismail.

As usual, we the 'wai-sek' (direct translation - 'glutton') gang went for the most typical street food in Malaysia, 'Rojak Mamak' and 'Cendol'. You can get this practically everywhere in Malaysia but the greatest challenge is to find one with the 'right' taste. There are only a few Mamaks (Indian Muslim) that can really make a good Rojak. The secret to a good Rojak lies in the sauce. It cannot be too sweet or too watery. It has to be just right!

Rojak is some sort like a salad but the only thing is that it is bathe in peanut sauce and has a slight sweetness and salty taste to it. It has bean sprouts, cucumber, potatoes, keropok udang (flour mix with small prawns and fried), coconut fritters, hard boil egg and the main ingredient is, the sweet crispy and juicy turnip. Depending on your preference, you can add on 'sambal sotong' (dried squid cook in sambal/chili paste). Oh, I can almost taste it! The best part, it's very cheap. Only RM3.50 a plate.

After a good meal and to quench your thirst, a bowl of cendol is a must. Mmmmmmm so refreshing. Cendol is made of rice flour mix with 'pandan' (screwpine) juice and cooked in coconut milk and brown sugar. You can add shave ice or bits of crushed ice in it. I prefer mine with shave ice. Some like to add red bean and sweet corn but I prefer mine plain Cendol.

Here's how the Rojak Mamak and Cendol looks like. This particular Rojak stall (the stall here is actually an open commercial truck) is parked opposite Petronas station along the main road in Taman Tun. You will have to eat your meal by sitting on a stool in an open area without any tables. This is one of the best Rojak Mamak in KL/Selangor.

Go have a plate and you decide if you like this stall.
Bon appetite!


Sunday, March 7, 2010

Western Mania


Sunday, March 7, 2010

What a hot day today! Good day to get all the laundry done. Within hours, it's already dry. Phew!

Anyway, the family decided not to have the usual rice and dishes for dinner. So, we decided on full western tonight and these are dinner..just like 'mini' Christmas dinner!

Menu: Garden Salad, Mashed Potatoes, Baked Red Snapper and Roasted Lamb Chops!


Marinate lamb with salt & pepper. Pour some olive oil and bake.


Chow them down, baby!!


Marinate fish with black pepper and seasoned salt. Just before baking, sprinkle olive oil, lemon juice, a little butter and a few sprigs of fresh rosemary.


Sunday, February 7, 2010

My little Garden of Herbs

Friday, February 12, 2010


My husband and I love gardening especially herbs and fruit trees. The little area in our front yard which we are proud to call 'our little garden', we have a man-made pond (designed and created by my very creative 'DIY' husband and brother in-law) is surrounded by orchids and potted plants. The pond complete with a mini 'waterfall, is about 10 years old now and has about 20 odd carps and parrot fish. If you don't have a pond in your home, maybe you should consider having one! It has a calming effect on ones tired soul!

Have you seen grape tree grow in Malaysia! If you think grapes can only grow in cold climate, well think again. It actually requires the opposite to grow well. It needs direct sunlight! I bought this grape plant when it was only about 3 weeks old and only about 2 feet tall. After about 1 1/2 years later, look at how tall it is but I'm still patiently waiting for it to flower and finally some grapes to eat. I just love the beautiful fragile leaf and it's vines. It also provides shade for the orchids and the pond as well. See my healthy grape tree below.


Ok, now, if you originate from Malacca, you will recognize this fruit/vegetable plant. This is called 'Terung Assam'. The plant has big thorny leaves and it produces small round fruits about the size of cherry tomato. It has velvety texture on the surface of the fruit and is yellowish orange in color when it's ripe. We usually add it into the 'sambal belacan' or add it into Assam Pedas. It's very sour and the flesh is full of very tiny seeds. I've been trying to plant Terung Assam for many years but unfortunately not successful. Then one fine day, I had a wonderful surprise to see one sprouting from my garden and it grew and grew and grew. Now it's about 3 feet high and is flowering. Hopefully will get some fruit soon! I know my neighbor is also eyeing it..yes, he's from Malacca too and knows what the fruit is used for! Hee..hee..don't worry, thy neighbor, I shall share my 'treasure' with you when the 'treasure' grows!

Here's how the plant looks like. You can see the flowers blooming.

Terung Assam Plant


Do you know where the blue comes from in Nyonya kuehs? It's not 'nila' which is used to wash white clothing ok. That's not edible at all. Probably the kuehs you buy from the mall, are made with edible blue coloring. For authentic Nyonya kuehs, we use 'Bunga Telang'. You can extract the color by boiling the flower in water and squeeze the flower. Not many houses plant this and even if you do find one in your neighborhood, most often you will get single petal 'Bunga Telang'. The one that I have in my garden is double petal 'Bunga Telang'. You can pluck the flowers when it's fully bloomed and dry it out in the sun. Store it in the refrigerator and it can last for years. Here's the 'Bunga Telang' in my garden. It's beautiful and since the plant is a creeper, you need to trim it often.

Wonderful wonderful Bunga Telang!


Bunga Kerang Nenas or Oyster Plant.


For this particular plant, you may have seen this being planted along the streets in your neighborhood or in the garden of some houses. This is called 'Bunga Kerang Nenas' or 'Oyster Plant'. Rhoeo Spatachea is the scientific name. The Oyster Plant has long strappy leaves which are green on top and purple to green on the bottom. It bears small white flowers at the base of the leaves. It is often used indoors and outdoors as an ornamental plant. The plant sap can cause skin irritation and various symptoms if large quantities are eaten.

The folklore has it that it has medicinal properties if taken correctly as it can cure cough, cold, coughing phlegm with blood, whooping cough, nose bleed, bacillary dysentery, blood in the stool. When the leaves boiled in water with barley, it is believed to have cooling properties and can relief fever. If you research further in the internet, it claims that in Mexico, Rhoeo Spatachea has been used to treat cancer. A study was done to validate its antitumoral property. It showed a reduction of preneoplastic lesions and justifies continuing further studies for its chemo prevention potential.

Well, since we are blessed with what Nature has to offer, there's no harm in trying out, right? Anyway, there's no preservatives or chemical. So, why not?

My other wonderful, wonderful herbs growing in my garden, are my all time favorite which are the Kaffir Leaves or Daun Limau Perut and Tumeric Leaves. These two leaves are a must in most Nyonya cooking. It adds flavor and aroma to the food.

Mother Nature is just wonderful! That's why we have to work together to preserve what Mother Nature has been offering us.


Kaffir Leaf (Daun Limau Perut) and Tumeric Leaf (Daun Kunyit)


My latest addition, is the Rosemary. This herb is more suitable for western culinary. This is given to me by my sis.

Rosemary.

I do have other plants but it will be too many to add into this blog and probably you'll be bored to tears! So, until my grape tree bears fruit, you can bet that I'll post it in my blog!

Chinese New Year and Valentine's Day is just 2-days away...so, Gong Xi Fa Cai & Happy Valentine's Day to All!

Be Safe!


Pavlova Has it been more than two years already since I've lain dormant?  Really?  Two whole years?!! Oh my... then it's about t...